Previewing & launching experiments with Mojito JS Delivery
Building the JS container
Whenever you make changes to experiments in Mojito, you need to build/publish your container.
- (Optional) Customise your Mojito container name in
repo/config.js - If you haven't done so already, install the necessary NPM packages:
npm install - Build your Mojito container:
npm run build
Previewing experiments
You can force either our Chrome Extension or manually through URL parameters.
1. Mojito Chrome Inspector
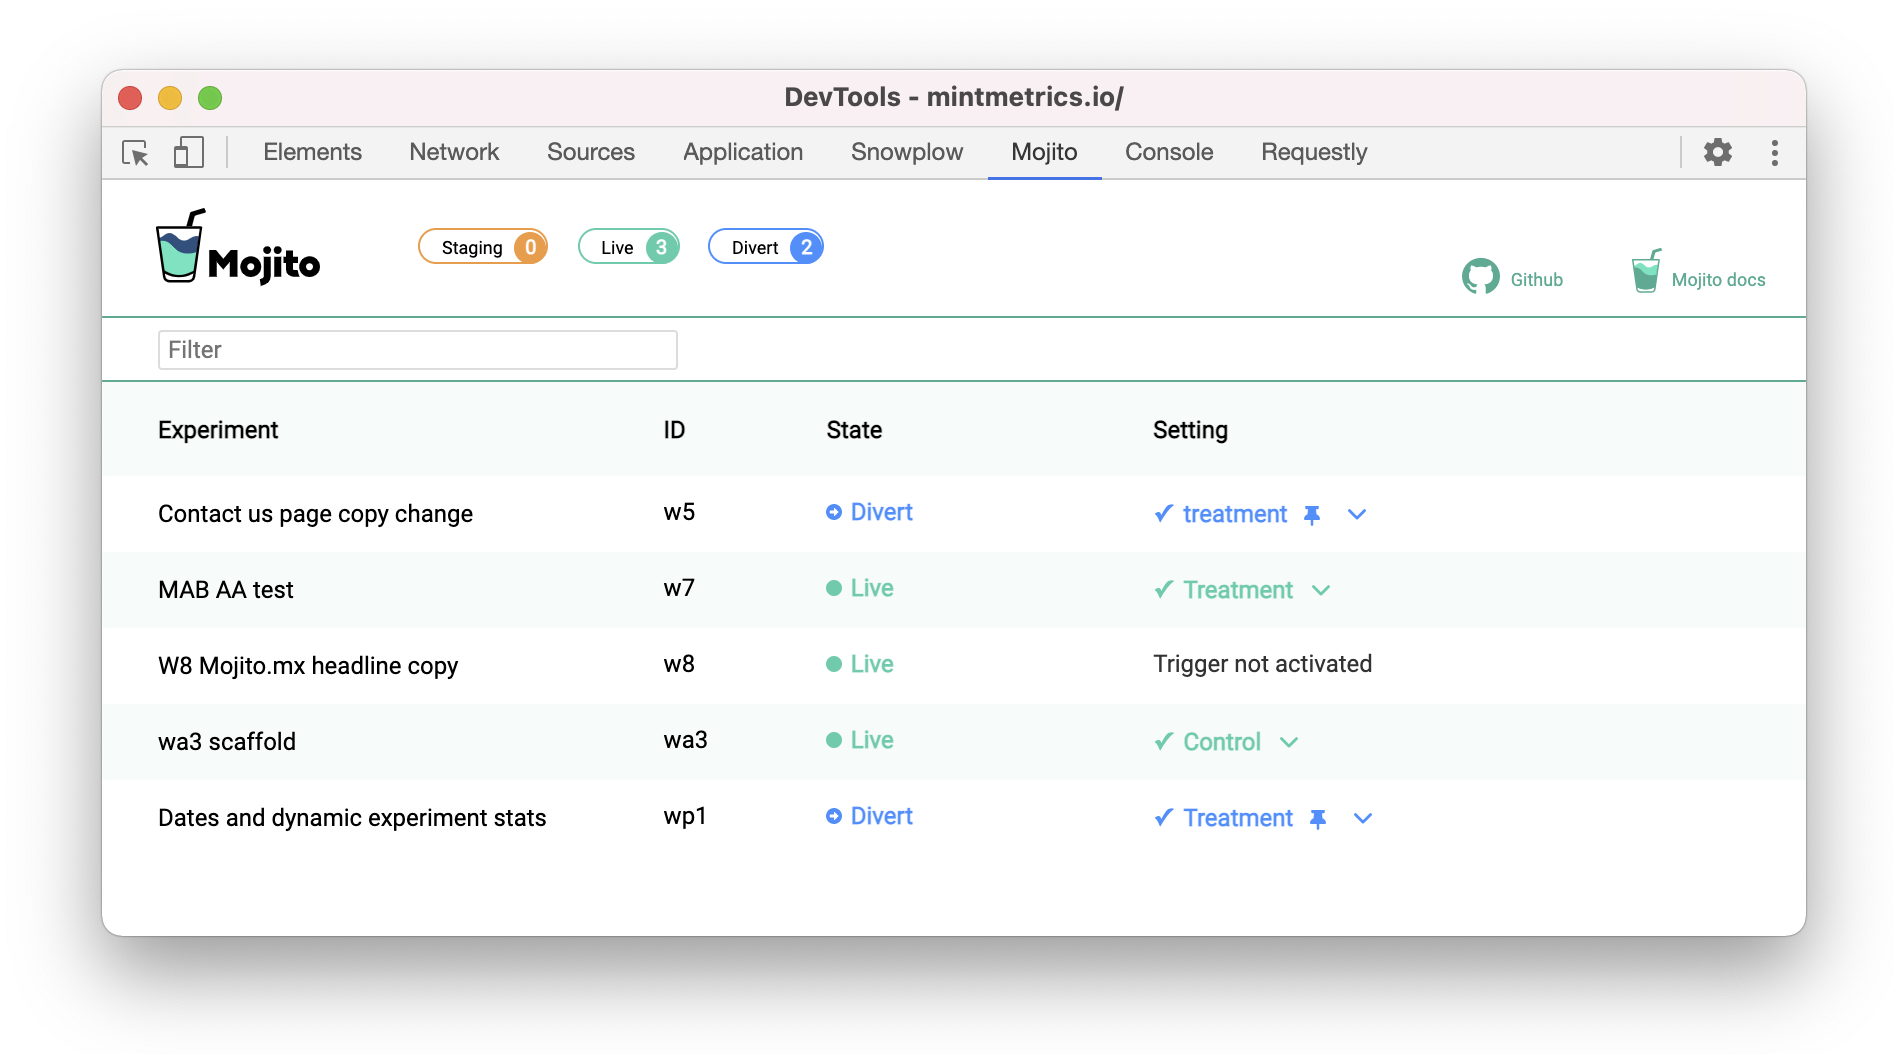
The extension works in the background to detect Mojito and any experiments on the page. It was designed with performance in mind and to keep tucked out of the way, in Developer tools.
Features:
- New: Dark mode support
- Detect if Mojito is installed and running on the page
- See how many active experiments are running on the page
- Preview a test's recipes
Add it to Chrome
Visit the Chrome Web Store to install the official extension.

2. Force URL parameters
To preview a variant of an experiment, you can force it by URL query parameters:
mojito_{id}={variant_id}
| Token | |
|---|---|
{id} | Experiment id to be previewed |
{variant_id} | Recipe/variant id to render |
Example
https://mywebsite.com/?mojito_ex2=1
This forces the treatment variant of our simple experiment to be displayed on mywebsite.com.
Notes
-
Forced variants will respect experiment trigger activation conditions
-
Forced variants will not respect an experiment's
state, i.e. forcing works in both live and staging mode -
Multiple experiments can be forced at the same time by stringing URL parameters, e.g.
https://mywebsite.com/?mojito_w1=1&mojito_w2=1 -
Forcing variants will cookie you to that variant across pages and sessions, except when a test's
stateis indivertmode. To return to the control variant, you can:-
Force the control variant using URL parameters as above,
-
Or delete the cookie:
_mojito_{id}-staging
-
Launch & takedown
For most of the time you'll be building an experiment and QAing it in staging mode. But when it's ready to launch, you'll need to set it to allow traffic to be bucketed:
Launch
To launch an experiment, set its state parameter to live and check that sampleRate is set to a value greater than 0. E.g. 0.1 for 10% or 1 for 100%. All of this can be handled on the command line:
# Launch "ex1" to 10% of traffic, build and publish to production
npm run set -- live --waveId ex1 --traffic 0.1
npm run build
npm run publish --production
Takedown
To takedown an experiment, set its state parameter to staging (to keep the test in the container) or inactive (to archive the test from the container).
# Takedown "ex1", build and publish with the updated logic
npm run set -- inactive --waveId ex1
npm run build
npm run publish --production
Read more about experiment parameters.
Following any changes, you’ll need to build and publish your container.
Next steps
To use Mojito in a production site, you'll likely need to host the container on a CDN before including it in your site's header. Find out more about hosting and publishing.
You might also want to check out Mojito's JS utilities that are handy to get around some common experiment setup issues.